The FBA Guide: How To Get The Most Out Of Amazon Seller Central

This article is going to give you an overview of the things you’ll need to know to make the most of Amazon Seller Central when using Fulfillment By Amazon (FBA). If you’re a new FBA seller, you should find this information very useful, and if you’ve been selling for a while, you still may learn some things below.
We’ll be covering some of the basic items when it comes to setting up your account properly, since many sellers do not know how to optimize their seller accounts or may not have past experience to draw from when it comes to problem resolution as an FBA seller. Some of the primary topics include:
- Amazon Seller Central Account Setup
- Securing Your Amazon Seller Account
- Sharing Account Access Safely
- Updating Product Information
- Business Tools & Metrics
- Providing Customer Support
- Resolving Problems & Issues
1. Amazon Seller Central Account Setup
You’ll only need one Amazon Seller Central account in order to sell in a single marketplace with FBA. Even if you plan on selling several products through FBA, or even have a few different brands to list in the Brand Registry, you’ll still be able to do all of this within your main Seller Central account.
What You Will Need:
- Your business name (this will be visible to customers)
- Your real name and address, using your registered company address, if you have one
- Contact information for Amazon and separate contact information for Customers (doesn’t need to be separate but it’s recommended)
- Your “Shop From” location
- Your bank account information so that you can get paid
- Which regions you are willing to ship to (for associated costs, you would be better off setting up in other marketplaces rather than shipping a US FBA product to Europe)
Once this process is completed, you’ll also need to finish filling out your seller profile. This customer-facing information will provide details to potential customers which should help you make more sales on Amazon FBA:
A small seller logo (120px by 30px) which will be available on your Amazon storefront.
The “About Seller” section, where you can tell a story about your business, share your company values, or any other information about your company. This is a great opportunity to position yourself as a successful business, highlight your commitment to customer satisfaction, and instill trust in potential buyers that read about your business.
Return and refund policies.
Amazon Seller Central Fees:
If you plan to sell fewer than 40 items per month, then you can pay a small fee for each sale that you make (typically $1.00). This is generally not going to be suitable for entrepreneurial ecommerce business owners, so you will certainly want to upgrade to a Professional account, with a subscription fee of $39.99 per month. As a Professional seller on Amazon, you won’t be charged this fee for each sale, so it will be much more cost effective using this plan if you plan on selling more than 40 items per month.
| Individual selling plan | Professional selling plan |
| $0.99 per item fee for each sale | Monthly subscription fee |
| Single listing creation | Multiple listing creation using spreadsheets and uploads |
| Online listing and order management | Inventory and order management using reports and feeds |
| Access to tools on Seller Central to perform account functions | Access to Amazon Marketplace Web Service to upload feeds, receive reports, and perform other API functions |
International Marketplaces:
The only time you would need to set up additional Amazon Seller Central accounts is if you plan to sell your products in multiple regions simultaneously. Amazon allows unified accounts for North America (Canada, US, and Mexico) and Europe (UK, Germany, Italy, France, and Spain), but will require separate accounts for other international marketplaces. You will need to create additional individual accounts for the other marketplaces like China, India, or Japan, if you plan on selling outside of North America or Europe.

2. Securing Your Amazon Seller Central Account
Amazon recently introduced two-step authentication! This means that rather than just entering your username and password, you can add an additional layer of security to your account by having to enter a unique security code on computers and devices that you haven’t previously designated as trusted. This second security step could include one of the following methods:
- Text Message – Amazon will message a secure code to your verified phone number.
- Voice Call – Amazon will call you and an automated code will be read out on the phone.
- Authenticator App – You can use a smartphone app like Google Authenticator to login to your account, which will generate a secure code you’ll be able to use to sign in.
Tip: It’s worth mentioning that you should also generate unique, secure passwords for everything business related, especially on Amazon Seller Central. Make your passwords at least 12 characters long, and ensure that they include random numbers, letters and special characters to defeat any potential guessing attempts. That means using a password like “mybusinessname123” won’t be enough to secure your account from potential intruders. You could try a free password vault service like LastPass to generate and store your passwords securely, if you want to generate very secure passwords and store them for later use.
3. Sharing Amazon Account Access Safely
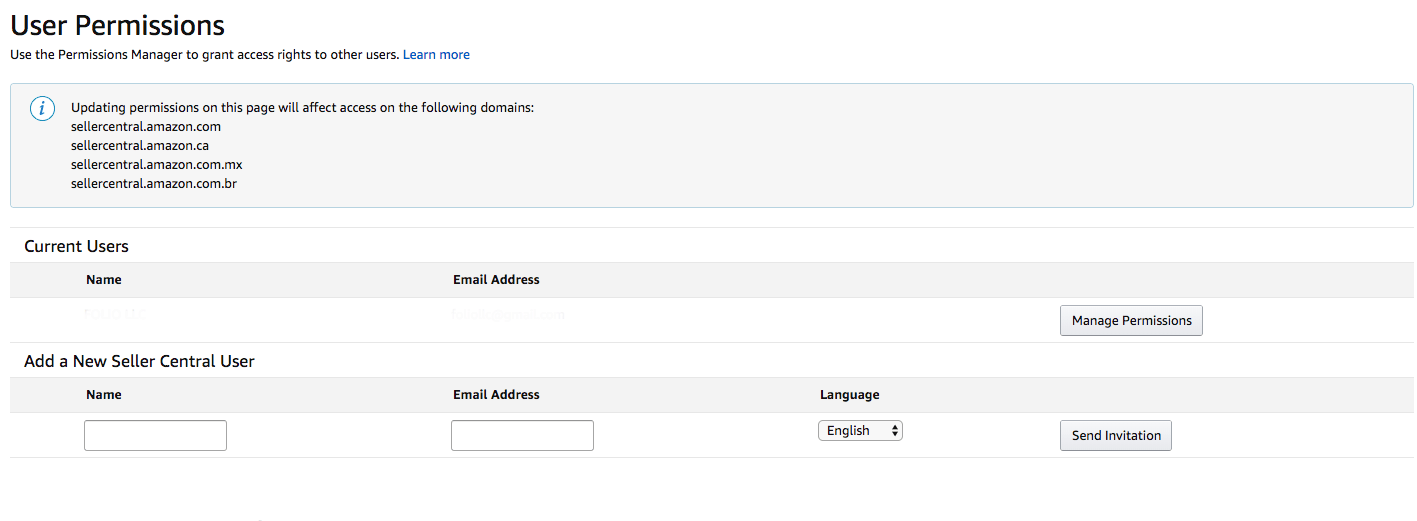
We understand that there are many Amazon sellers who are expanding, outsourcing, and looking at hiring employees or virtual assistants (VA’s) to help out with routine business tasks. You can easily grant access to your Amazon Seller account for other people without needing to contact Amazon by using their invitation process. If you are thinking of spreading some of your workload, this is a simple way to get someone set up!
- To set up new users, the primary Account Manager (Owner) can add a list of people who can access the system and what rights those users should have during the Amazon Seller Central Registration process, or within the User Permissions area.
- Amazon will then send an email invite to new users.
- After clicking the link to the invite, the new user then navigates to a page that instructs he or she to sign in with an existing Amazon account or to create a new one.
- Once that process is complete, they will then receive a confirmation code to pass on to the Account Manager.
- After the Account Manager confirms using the code, the new user can go to sellercentral.amazon.com to log in using their account.
- You will then be able to easily add, edit, revoke or change user rights at any time.

4. Updating Product Information
Making the most of the product information fields that form your product listings seems obvious, but when was the last time you checked to see if your product listing information was complete and accurate?
When it comes to product listings, we must use all of the fields that Amazon provides us. It’s very important that you make the most of these and fill in as much product information as possible in an optimized way. Here are some tips for things you can check right now that could help boost your listing straight away:
- Are you using up all of the available space? Make sure you’re using all 5 features fields, including filling your description with useful information, writing up a narrative, and including your top keywords so potential customers can find your products.
- Are you using Enhanced Brand Content? If you are a Private Label product seller on Amazon, this can be a great way to make your listing more attractive visually by adding HTML and images in your description.
- How many product images do you have? Having more product images often results in more sales, so if you have just a few or no images at all, it’s important to add some.
- Have you ensured that your product information has been populated with relevant target keywords? Update keywords on the public listing that potential customers see, as well as including keywords in the “Search Terms” section in the back-end of Seller Central.
5. Business Tools & Metrics
One of the main reasons to get more familiar with Seller Central is that it holds all of your important business metrics, from your sales reports to advertising reports if you are running any Amazon pay-per-click campaigns to leverage more sales.
What do you think your most important business metrics are? The number of times people view your product? How many times someone purchases your product? Your conversion rate?
It’s important to keep a balanced overview of all of these metrics, and continue to review them over time to understand trends with your products or categories with relation to time and other listing factors. It’s vital to regularly evaluate these metrics to understand how your products are performing and how you can improve and scale your business online.
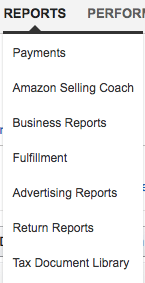
You can go into your reports in Seller Central from the main menu under “Reports”. In here, you will find archived reports for your payments, business reports (sales reports), fulfillment, advertising (PPC), and returns. You’ll be able to download any of these reports as a .csv and manipulate your data in any way you want. In an ideal situation, you would be running reports and diving into the data frequently to understand trends and make decisions to improve your business on Amazon, which is why many sellers elect to hire employees to review this data.
7. Providing Customer Support
You have customers, and sometimes, those customers have issues. As an Amazon FBA seller you could let Amazon handle your returns and customer support. But you will get far better results if you are involved in your own support. In any case, wouldn’t you want to know what your customers are saying about your product, or if there are any issues that you could resolve or improve?
Monitoring your returns regularly is very important because it can signal any red flags with a product. You can access returns reports in the reports section:

Also, you can also check any returns on a daily or weekly basis in the “Orders” tab, under “Manage Returns”:

Other than the obvious steps you can take in providing a high-quality product and ensuring your listing describes the product accurately, the best way to improve Amazon customer support (and therefore reduce returns), is by using email campaigns. With these email campaigns you can do so much to inform yourself or your customers, for example:
- Send an email when a return request is triggered, to ensure you are able to quickly respond to any problems and provide expedited customer service.
- Send emails at certain times after each purchase so you can provide additional support. For example, you can request seller feedback or reviews, or even send added related content or attachments to support the purchase.
8. Resolving Problems & Issues
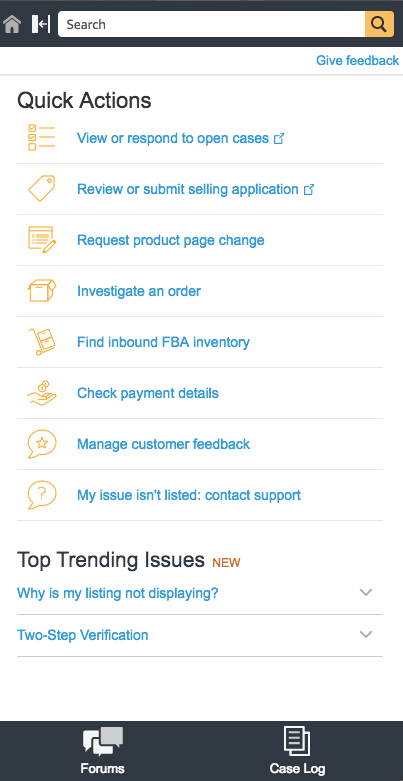
It can be difficult when an Amazon FBA seller runs into problems when using the Seller Central platform. Just as the platform itself sometimes gets a bad reputation when problems happen, so does Amazon Seller Support. The good news is, there is an infinitely useful wealth of help documents waiting for you. Just click the small help button in the top right-hand corner:

In here you will enter the Seller Central Help Desk, where you’ll be able to search and access a wealth of articles that will be useful for solving almost any problem you may have when using Amazon Seller Central.

If you still can’t find the answers you’re looking for, then you may want to try searching Google or FBA-related forums to resolve a most problems that you may encounter. The likelihood is that someone else has already run into a similar issue, so try searching for exact error messages.
If the problem you are having is technical, or maybe you are seeing some bugs then the best option is to just contact Amazon Seller Support. This can be a very helpful resource if you speak to the right person. If you go to the help desk as explained above, you’ll be able to review any open support tickets or access Amazon Seller Support using the contact options provided.
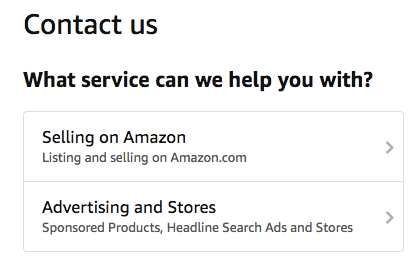
In order to get the contact options, you will have to first select your problem and the tool will try to offer you a relevant article. You can usually then click on a link to say your problem is not listed and then you will get some contact options. For some issues, you may also get a live chat option in addition to phone and email:
Remember to be as patient and descriptive about your problem as possible. If you still feel that you are not able to solve your problem with the support agent, just try again later with another representative!
Tip: Try using the call-back feature if you are busy or don’t want to wait on hold. Using this feature means that Amazon will call you back straight away on the number you provide which will let you speak to a real person. The messages function in the support panel in Seller Central is also useful if you aren’t able to use the phone, but it can often take a while longer to get a response.
We have heard so many Amazon FBA success stories, from people building brands on Amazon and quitting their corporate jobs to existing businesses branching out and selling on Amazon as a new revenue stream. No matter what your goals are with FBA, it’s important to make sure you understand and get the most out of Amazon Seller Central so you can have your Amazon business off to a good start. Let us know in the comments below if these tips have helped you along the way, or if you have any other useful ideas to share with the community!


